To start with you can leave the printer on and you can use the software called Pronterface to move the extruder about, but I do think it's easier to just hit the button in pronterface labelled motors off, and then move the print head about by hand. you won't damage the printer this way, but still be careful!
The first thing to do I guess is describe how the bed it put together.
There is a flat platform on which the bed assembly is mounted, on the underside of this platform is a series of nuts. going into these nuts are bolts that obviously can move up and down in the nuts.
The bolts are threaded through the metal bed and into the bolts.
Between the bolts and the platform that the bed sits on are some springs, these ensure that the bed in pushed as high as it can go on the bolts, so when the bolts are adjusted in and out of the nuts, the bed moves.
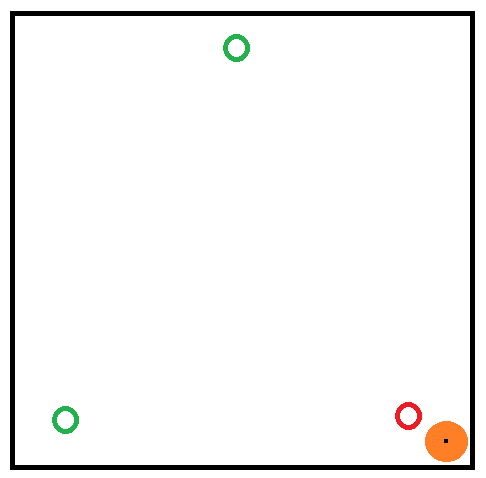
There is 1 bolt at the back and 2 bolts at the front.
To start with push the extruder head to the centre and back of the platform.

This is where you're going to alter the front to back level, Adjust the screw that's in the centre at the back until the platform is about the width of a credit card away from the platform, (in fact use a credit card). turn the screw anti clockwise to make the bed higher and clockwise to make the bed lower.
On the Solidoodle 2 you need to use a 2.5mm hex wrench to alter the bed.
Once the level at the back of the bed has been set move the extruder head to the very front and right corner of the print head, this is where you'll set-up the left/right tilt of the print bed.
Once you've adjusted this screw so that the printer head is about 1 credit cards width from the printer move the extruder to the left most side of the front and adjust that side.
Why credit card.
I'm suggesting setting the print head about a credit cards width during the process of levelling the bed because if you aim straight for 0.3mm and the front is slightly higher the first thing you're going to do is scratch the kapton tape when you move the print head from the levelled back to the much higher front.
Having slightly more space between the head and the bed allows you to see that the head is getting closer before it's too late.
Setting the bed height.
Now that you have the bed level you need to set the bed height, to do this the Solidoodle company suggest using a thin piece of card, like a metro card.
However, I think that if you have a set of feeler gauges you should use them, use the 0.3mm gauge.
Home the head in the X and Y axis (which put the head slightly off the bed, now home the bed on the Z axis (this will raise the bed)
Hit the motors off button so that you can move the extruder around.
Carefully move the extruder towards the bed.
If the bed if much higher than the extruder (and trying to move the print head over the bed won't work as the print head will just hit the bed then you need to look to the Z-stop screw at the back, turn it clock wise to make the bed home to a lower height.
Ideally you should have the bed ship with a Z stop set that the extruder won't hit the bed when you hit Z-Home for the first time.
In this case you can move the extruder to the middle of the bed, hit Z home.
insert your gauge in the gap.
If the gap is to big, move the Z-stop screw on the back wall of the printer anticlockwise. then press home again until you have the correct gap between the print head and the print bed.
No comments:
Post a Comment